What Causes Auto Window Tint to Bubble and How Professionals Prevent It
Auto window tinting is one of the smartest upgrades you can make for your vehicle. It reduces heat, blocks harmful UV rays, adds privacy, and gives your car a sharp, polished look. But nothing undermines those benefits faster than bubbles forming beneath the film. Those unsightly bumps compromise the appearance and, over time, the tint's effectiveness. Understanding why they happen and how professionals prevent them can help you make a smarter decision when it comes to protecting your investment.
Why Window Tint Bubbles Form
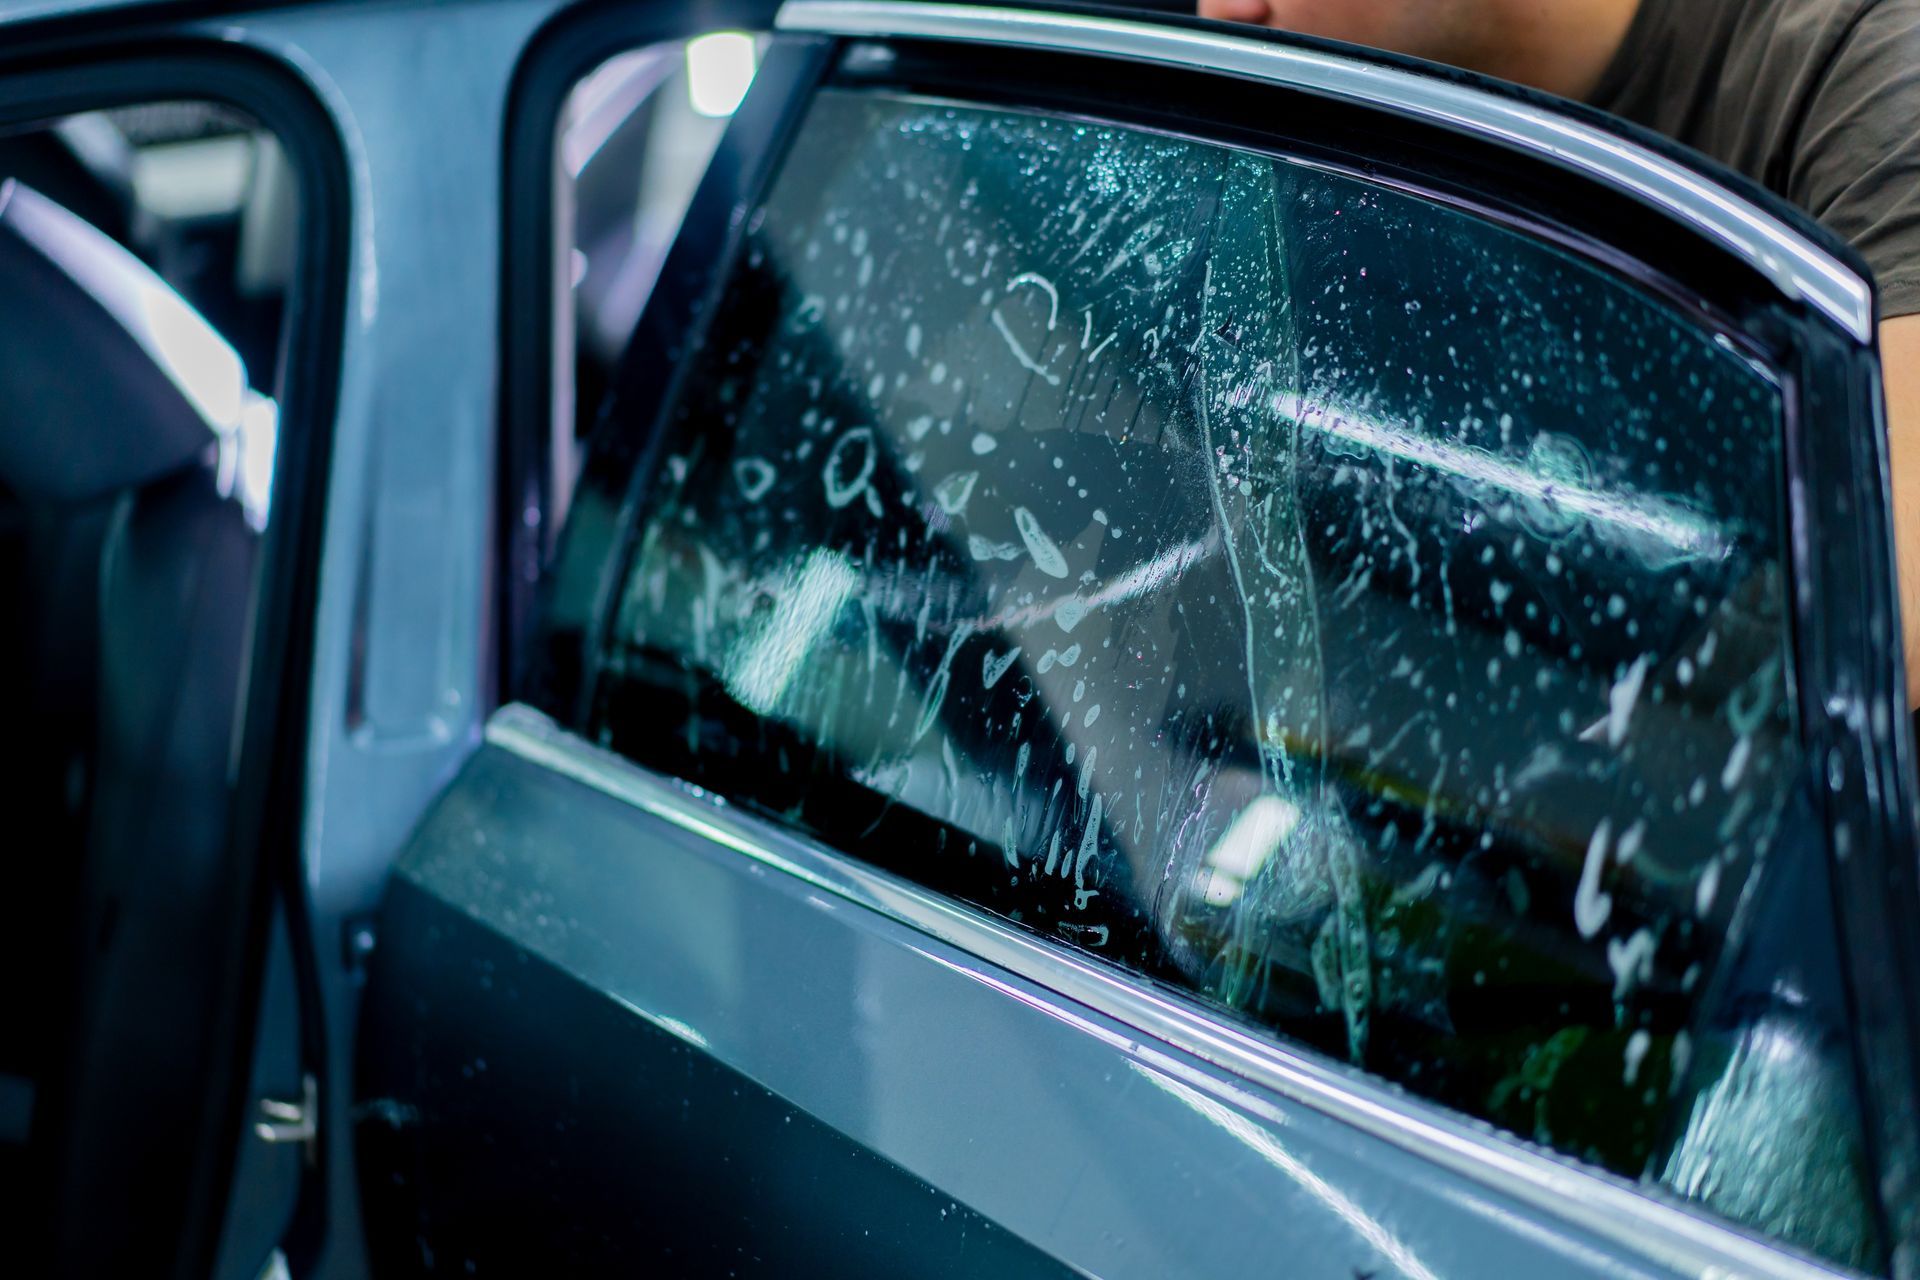
Bubbles appear when air or moisture becomes trapped between the glass and the tint film. The cause is often something you cannot even see. A tiny speck of dust, a thin layer of oil residue, or a microscopic particle on the glass surface is enough to create a gap where air pockets develop. Those pockets show up as bubbles or wrinkles that ruin both the look and the function of your tint.
This is why the work begins long before the film even touches the glass. Surface preparation is everything. Professionals clean every inch of the window using specialized, ammonia-free cleaners and lint-free microfiber cloths that leave no fibers behind. They inspect the glass under bright light and make multiple passes to ensure nothing remains on the surface. Skipping or rushing this step is one of the most common reasons budget tint jobs fail.
Another contributing factor is improper installation technique. If the film is not kept sufficiently moist during application, it can grip the glass prematurely, sealing in any trapped air before it can be worked out. Environmental conditions matter as well. Installing tint in extreme heat causes the film to dry too quickly, while high humidity introduces excess moisture between the layers. Professional installers account for all of these variables before beginning a job.
Film quality also plays a role. Premium films feature stronger, more stable adhesives that resist bubble formation and hold their bond even under prolonged sun exposure. Lower-quality materials are more prone to lifting and bubbling, particularly near heat sources like rear defroster lines.

The Tools That Make the Difference
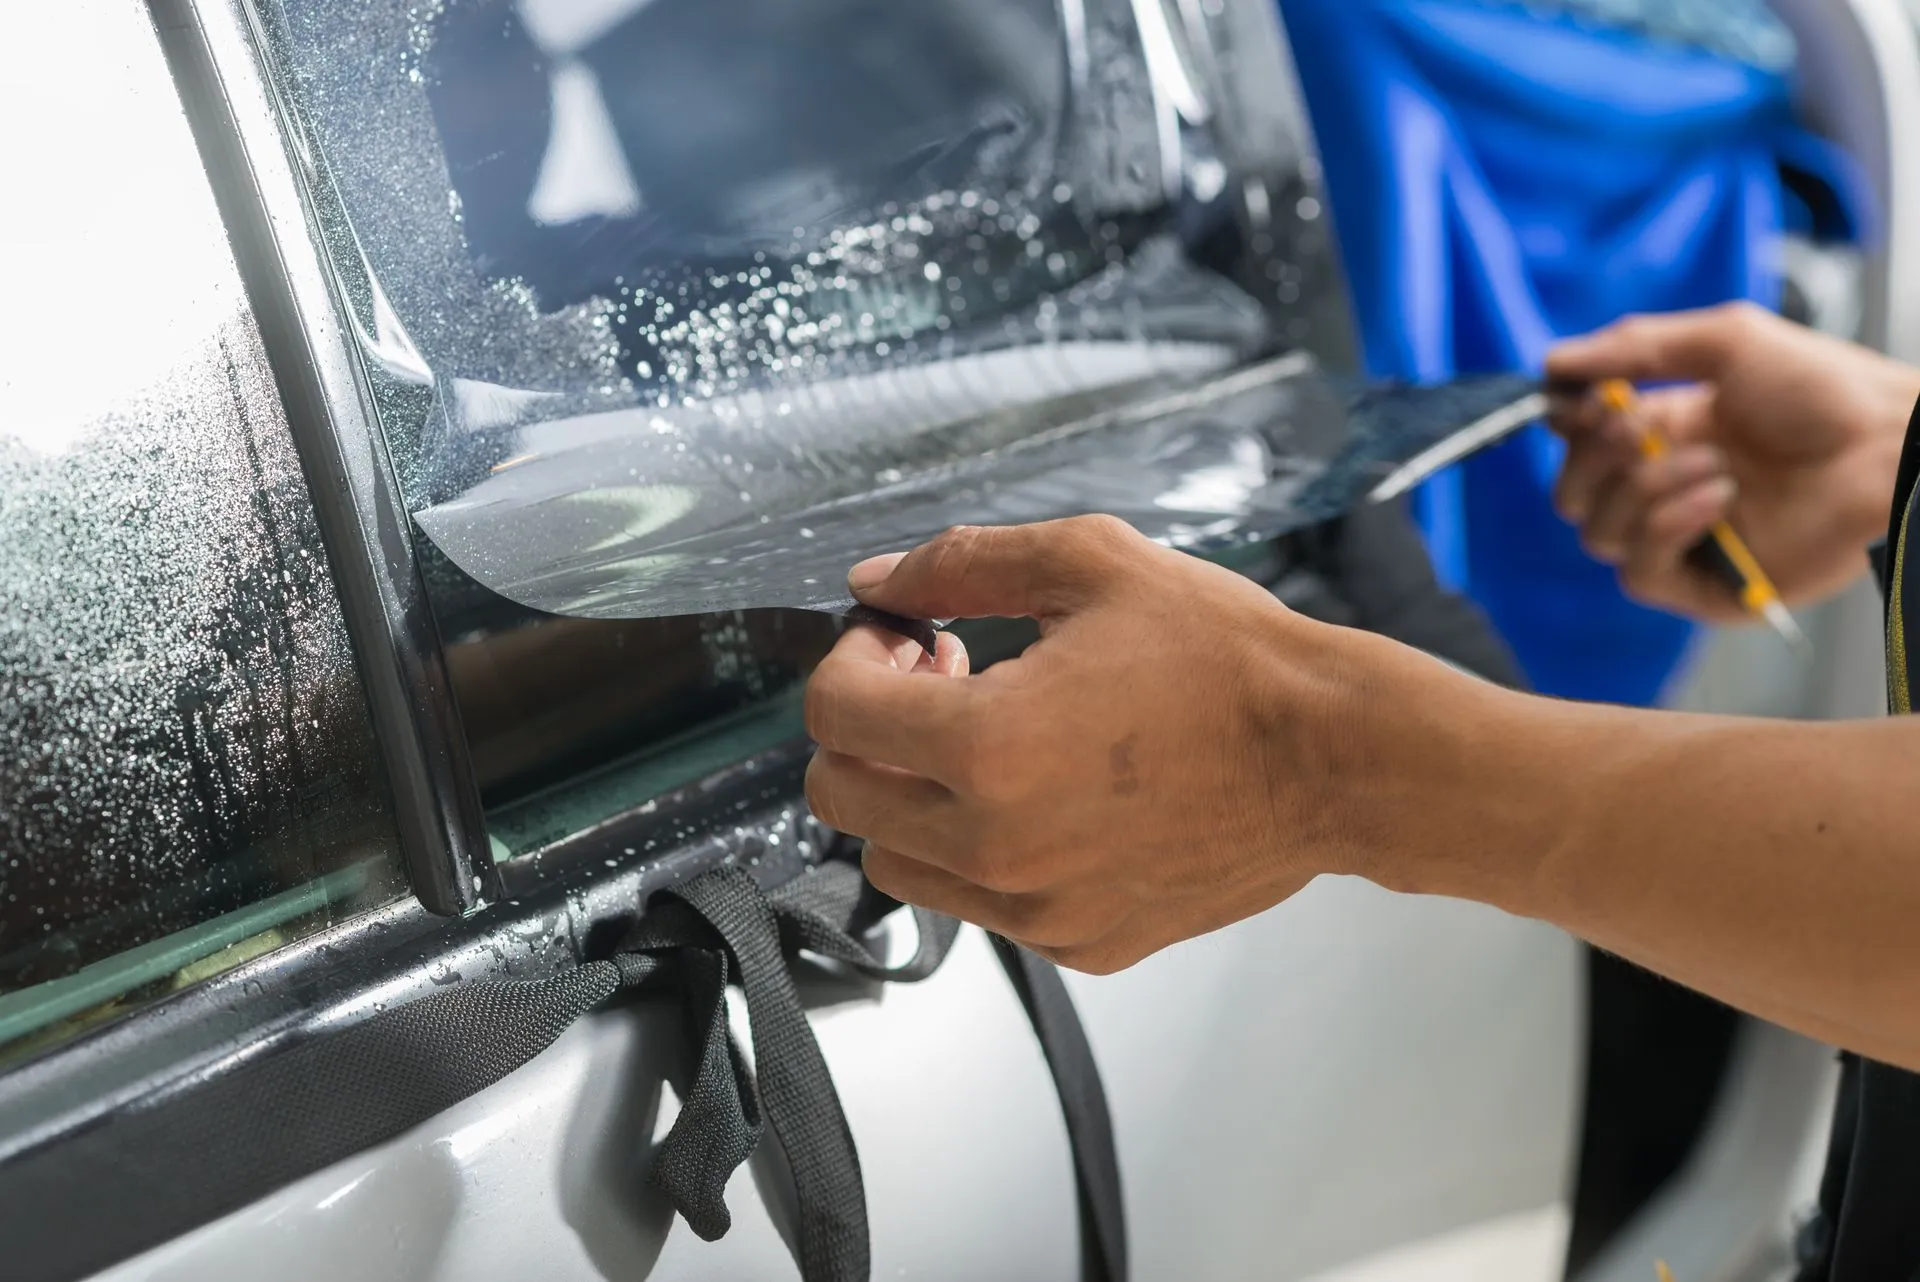
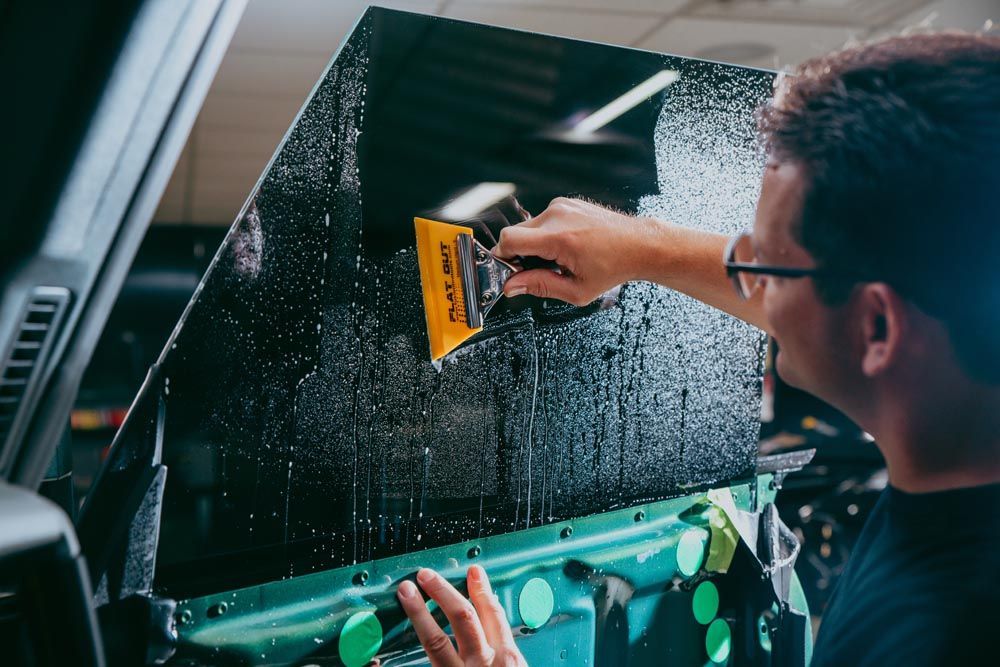
Professional window tinting requires more than skill. It requires the right equipment, and each tool in a professional's kit serves a specific purpose in preventing bubbles. The squeegee is the most essential of these tools. Professionals keep several on hand, using firmer versions for broad strokes across large windows and softer, narrower ones for working near edges and curves. The squeegee drives out trapped air and excess solution from beneath the film, and the quality of that tool directly affects the outcome.
A heat gun is equally important. After the film is placed, controlled heat softens the adhesive and speeds up the evaporation of any remaining moisture beneath the surface. This is especially critical around curved windows and corners where the film needs to conform tightly to the glass. Without proper heat application, residual moisture can slowly push through the adhesive layer and ruin the finish over time.
Precise trimming tools ensure clean cuts along window edges so no excess film is left to peel or collect debris. Corner tools with specific angles allow technicians to tuck the film tightly into spaces that are easy to overlook but quick to fail. A fine mist sprayer, rather than a simple squirt bottle, delivers even coverage of the soap-and-water solution used during application. Each of these tools contributes to a result that looks clean, professional, and built to last.
How Professionals Apply the Film
The application process itself follows a deliberate sequence that minimizes the chance of bubbles forming at any stage. It starts with a carefully mixed soap-and-water solution sprayed onto both the glass surface and the adhesive side of the film. This lubricating layer allows the installer to glide the film into position and make adjustments without it sticking prematurely. Getting the placement right before the film adheres is what separates a smooth finish from a wrinkled one.
Once positioned, the technician uses the squeegee to work from the center of the film outward toward the edges. This methodical approach pushes air and excess solution out rather than trapping it underneath. Multiple overlapping passes are made, starting with more moisture present and gradually moving toward a drier surface as the film begins to set. The pressure applied during this process has to be consistent. Too little and air pockets remain; too much and the film can stretch or distort.
Heat is then applied to finalize the bond. Warming the film softens its adhesive, allowing it to grip the glass more firmly while also evaporating any lingering moisture. This step also smooths out minor imperfections and helps the film conform to the shape of the window, which is especially important on curved rear glass.
After installation, the curing period is just as important as the application itself. Professionals advise leaving windows rolled up and avoiding any washing for three to five days following installation. During this time, residual moisture evaporates naturally and the adhesive fully bonds to the glass. Rushing this stage by rolling windows down or washing the car too soon can cause edges to lift or bubbles to reappear.
What to Do if Bubbles Appear
It is worth knowing that not every bubble right after installation indicates a problem. Small water-based bubbles are common during the first week or two and typically disappear on their own as the film cures. These are simply pockets of the installation solution working their way out. Patience is the appropriate response here. However, bubbles that persist beyond two weeks, grow in size, appear white or opaque, or show visible particles inside them are a different matter. These point to air entrapment, contamination, or adhesive failure that will not resolve on its own.
A qualified technician can often address persistent bubbles without removing the entire panel of film. Controlled heat applied with a heat gun softens the adhesive enough that a squeegee can press the air out and allow the film to re-bond. For stubborn cases, a skilled installer may use a fine needle to carefully puncture the bubble and release the trapped air before resealing the area with heat. This process requires a steady hand and trained judgment to avoid damaging the film. When done correctly, it restores the smooth appearance and extends the life of the tint without requiring a full reinstallation.
Choosing the Right Professional
The quality of a window tint installation is ultimately determined by the person doing the work. A trained, experienced installer brings not just technical knowledge but the practiced judgment to anticipate and correct problems in real time. They understand how temperature, humidity, glass condition, and film type all interact, and they adjust their approach accordingly. That level of expertise simply cannot be replicated by a rushed or undertrained technician, regardless of the materials used.
When evaluating a shop, look for certified professionals who can speak clearly about their process: how they prepare the surface, what solution they use during application, and how they handle the curing period. A clean, organized workspace is a good indicator of the care that goes into the work. Ask about their warranty policy. A confident installer stands behind the results and will address any issues that arise after the job is done.
Investing in a quality tint installation from a skilled professional is the most reliable way to protect your vehicle, your comfort, and your money. Done right, window tinting enhances every drive and holds up beautifully for years without a bubble in sight.
Bubble-Free Tint Starts in Southwest Michigan
If you want window tint that holds its clarity over time, High-Def Detailing delivers results you can rely on. Our experienced installers use proven techniques and premium materials to eliminate the common causes of bubbling and lifting. The result is a sleek finish that enhances your vehicle’s style while improving comfort and protection from the sun. Every detail is handled with care to ensure long-term performance.
Schedule your window tint service in Southwest Michigan today!